The PARA method
Organizing your notes can be surprisingly time-consuming. You do it more often than you think, from saving reading lists to capturing inspirations. This can quickly lead to a cluttered mess, and cleaning it up becomes a recurring chore. There's also the "Bowser stage": endlessly jumping from one note-taking app to another because you find a new app that seems to do the same thing, but "better."
Context
I was a huge fan of Google Keep for its simplicity, but ditched it for two reasons: limitations regarding the nature of data I'm saving besides images and check notes (files, data tables), and trying to move out from, as explained in my previous post, process to decentralize my data. Colored notes and folders were enough after some heavy use.
The journey to migrate to a new note-taking app began after two choices popped out: Obsidian and Notion. I went with the latter because of accessibility and features, compared to the former even if they had a proper app.
And then the PARA method appeared a few months later while I was chatting with a friend. The highlights were that it was app-agnostic, meaning you can implement it in your favorite app, and secondly, it was a one-time setup that's (iconically) time-consuming but has a positive impact afterward. He also demoed his setup to me, so I liked the way all his stuff, or should I say literally his digital life, was organized, from personal notes to side/projects, work-related stuff, and legal documents.
The PARA method
Let's get to the heart of the matter. The method was created by Tiago Forte, it's an app-agnostic method so you can implement it in almost whatever note-taking app you use. You don't have to stick literally with what's defined, it's more flexible and extensible than you think, just keep in mind the main idea.
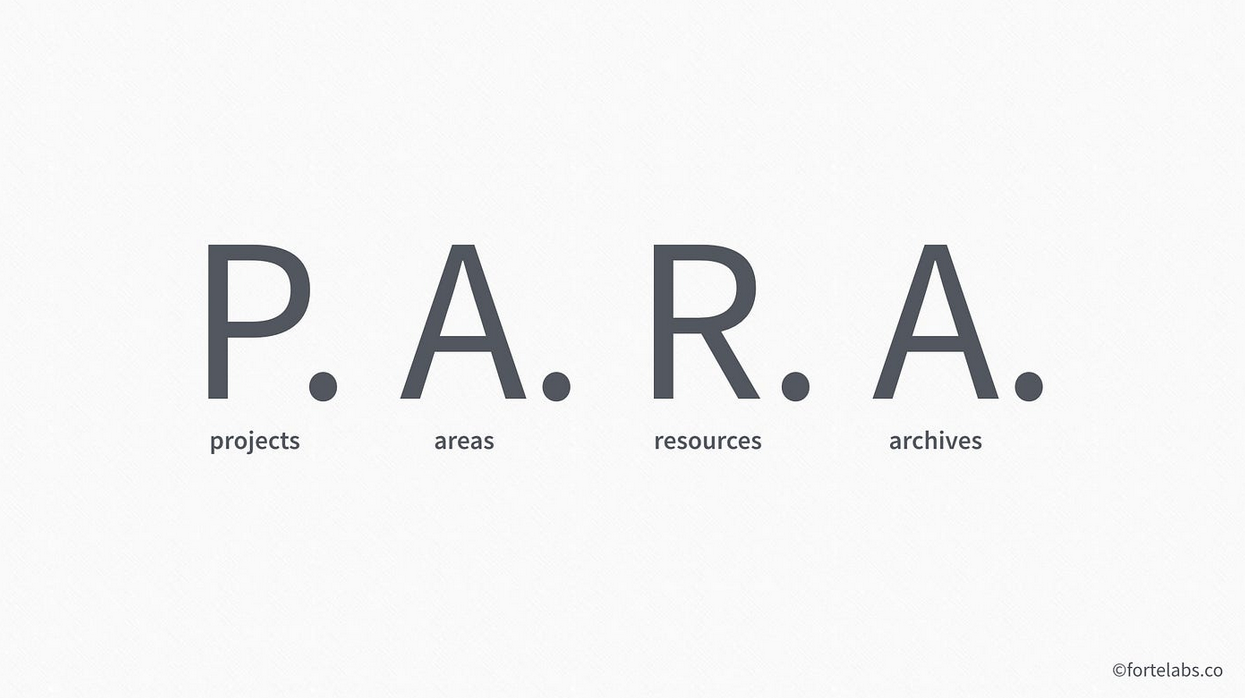
It consists of four key sections:
- Projects
- Areas
- Resources
- Archive
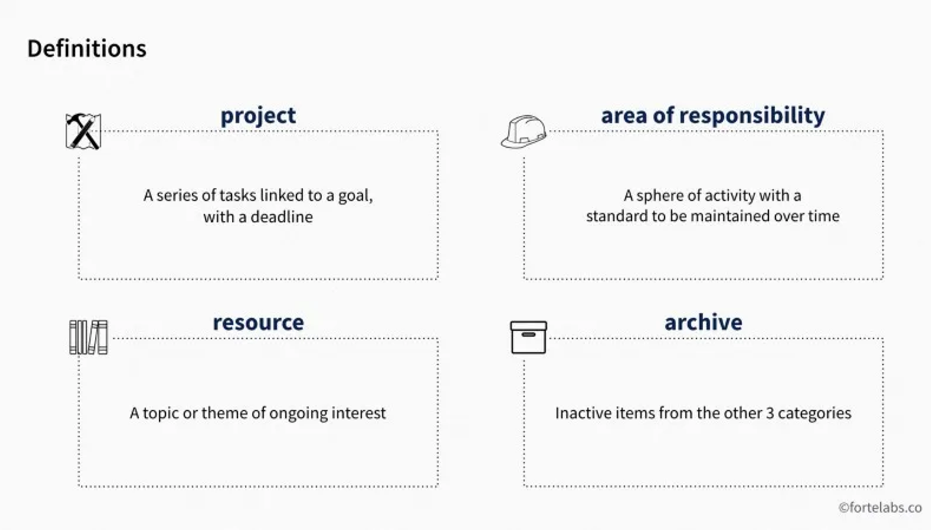
Let's break down what each of these means:
- Projects:
- A project is, well, literally a project! By definition, it involves specific tasks with a defined timeline or process. Unlike a dream or hobby, a project has a clear goal you want to achieve within a certain timeframe. This prevents it from lingering indefinitely and becoming a burden.
- The most important elements of a project are a start date, an end date, and a clear goal. The goal isn't there by accident - a project without a defined goal is more likely to remain a dream or simply become an ongoing hobby. Finally, within the PARA method, a project always belongs to a specific area of your life.
- Areas:
- While projects have a defined timeframe, areas in the PARA method represent ongoing aspects of your life. These are "places" to store information relevant to these long-term commitments. Think of them as buckets for things like your career, side projects, health, legal documents, and anything else you define as important. Unlike projects with deadlines, areas require ongoing maintenance and regular updates.
- Resources:
- Think of resources as an enhanced bookmarking system. They go beyond simple links and can store various types of information, including files, databases, and more (depending on your chosen note-taking app). The beauty of resources is their flexibility. They can be linked to any relevant area or project, or even both, but this linking is entirely optional.
- Archive:
- The archive section is incredibly useful for decluttering your PARA system. This is where you can store completed projects, areas that are no longer relevant, and outdated resources—essentially anything that no longer requires active attention in your other sections.
While the PARA method focuses on organizing information with clear purposes, you might encounter things that don't fit neatly into projects or areas. For these situations, the PARA method includes an "Inbox" as a temporary holding ground.
Think of the inbox as a collection point for tasks or information that you haven't yet decided how to categorize. It's a place to capture these items without cluttering your other sections. Once you've had a chance to review your inbox, you can then determine the most appropriate category (project, area, or resource) for each item.
So to summarize:
- Projects vs. Areas: Projects are temporary, goal-oriented endeavors with deadlines. Areas, on the other hand, represent ongoing aspects of your life where information accumulates, like "Health" or "Career."
- Projects Need Goals: A project without a clear goal might become a never-ending task or simply a hobby.
- Area vs. Resource Content: Areas store personal, relevant information specific to your life, while Resources hold more general and broadly useful materials like reference articles or external links.
- Flexibility is Key: The PARA method is adaptable. You can start using it even if you don't currently have a lot of projects, areas, or resources.
One of the strengths of the PARA method is its flexibility. It adapts to your workflow. For example, areas, which house ongoing aspects of your life, typically require less frequent updates compared to projects with defined deadlines and action steps. The number of updates in an area will naturally depend on the specific area and your activities within it.
While the PARA method is powerful, it's not a one-size-fits-all solution. For example, I initially used it to track my movie and series watchlist. However, dedicated platforms like Letterboxd, Goodreads, and Anilist offered a more comprehensive experience for those specific needs. Now, I primarily use PARA for managing a curated list of items to tackle next, drawing from various categories.
Implementation (with NotionHQ)
Let's try implementing the PARA method using NotionHQ. Since I'm familiar with its features from previous projects, it seems like a good fit. Don't worry if you prefer another note-taking app like Evernote – the principles can be adapted to your existing tools.
While tasks aren't a core component of the PARA method, many users create a separate database for them, optionally linked to projects.
Here, we'll explore two implementation approaches:
- Approach 1: All-in-One Database with PARA Categories
- This approach utilizes a single database with categories reflecting the PARA sections.
- Approach 2: Separate Databases by Section (Except Archive)
- This option involves dedicated databases for each section (excluding the archive), with an "archive" attribute (checkbox) within each database.
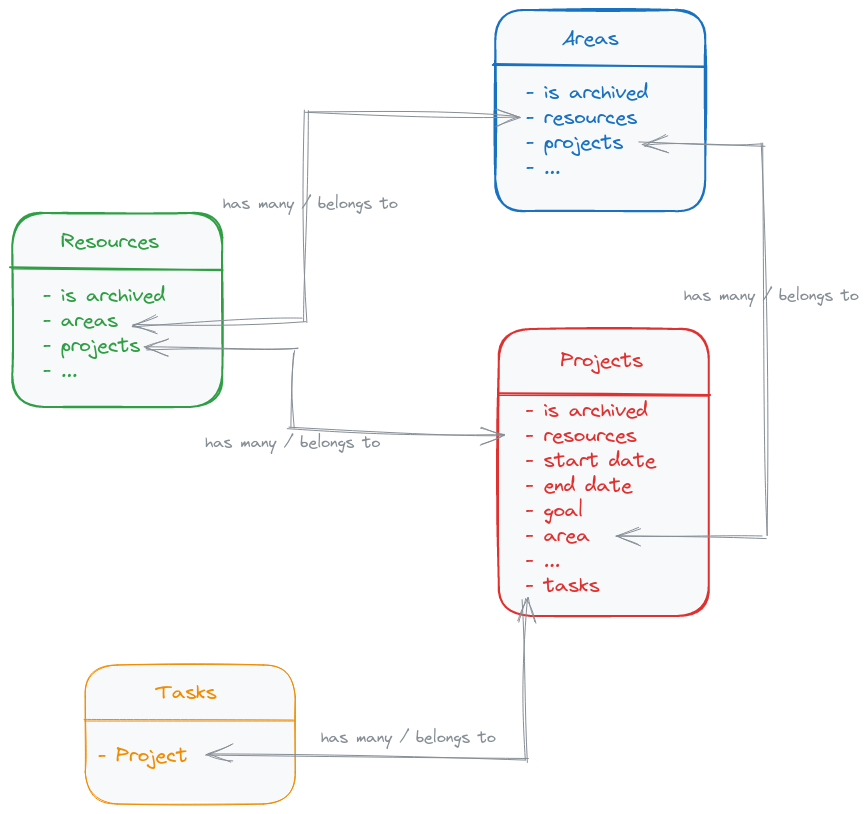
Personally, I prefer the second approach for its clarity and preference for separate entities. It avoids the need for constant top-level filtering.
For archived items, I created a new page with dedicated views for each section, filtered to display items marked as "archived."
To facilitate quick access to tasks and resources, I designed custom templates for projects and areas. These templates display lists of relevant tasks and resources filtered by the current project or area.
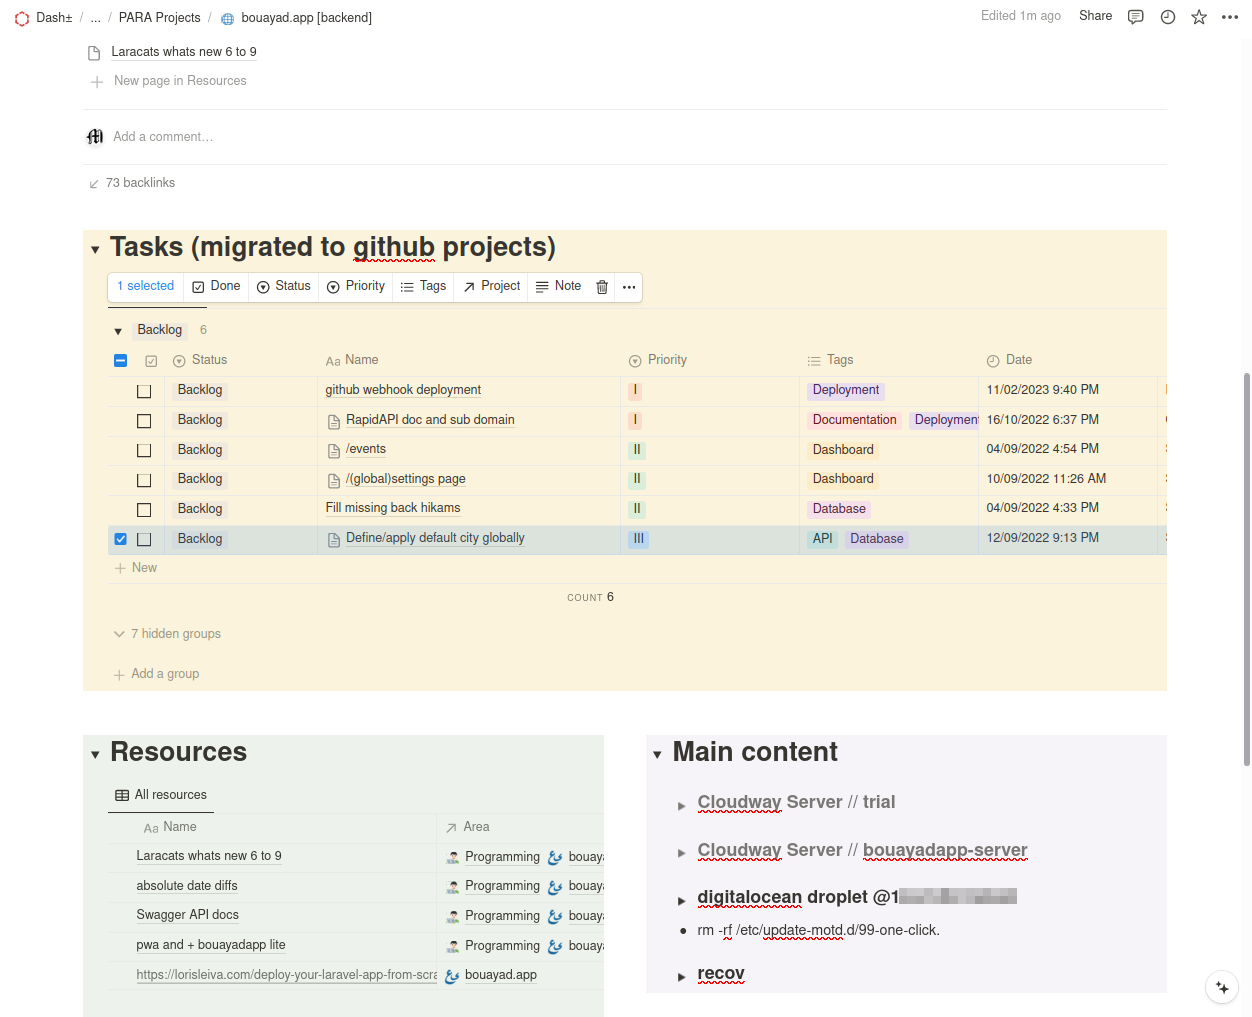
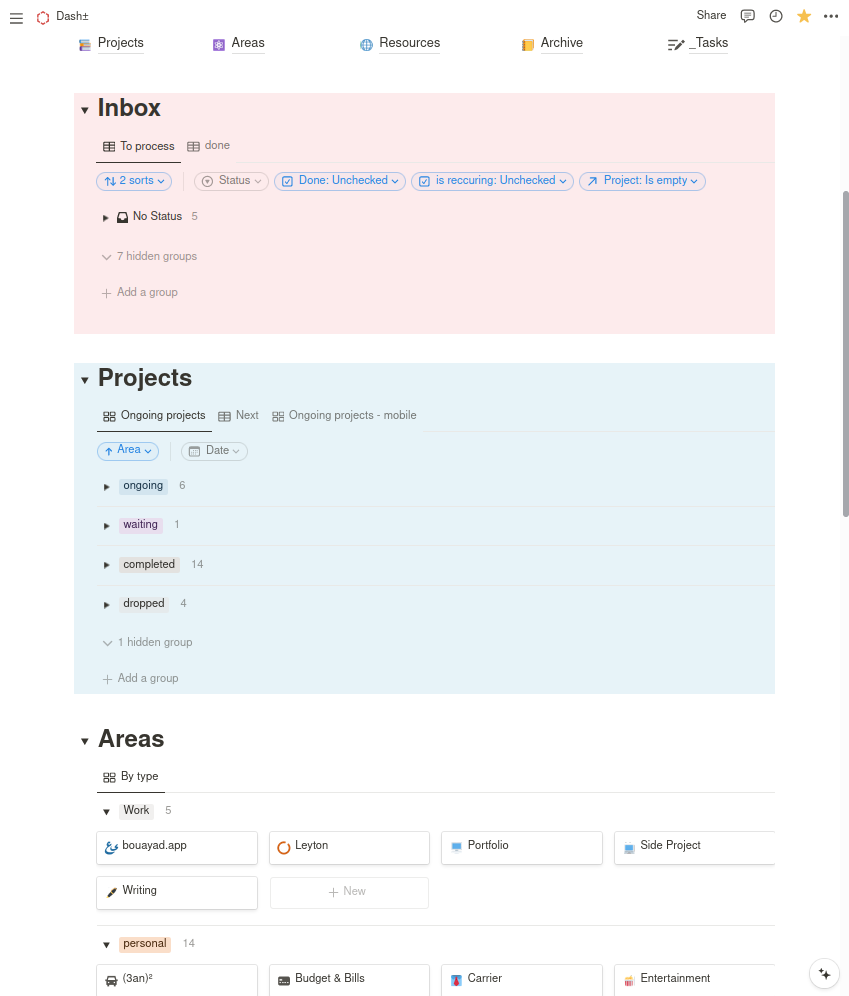
Finally, I created a "dashboard" page that incorporates views from various sections.
Conclusion
In conclusion, I wanted to share the PARA method, a surprisingly effective system I've used for a couple of years now. You can read more about the method in this article which the creator made it himself.
While online explanations often focus on specific apps (like Notion), remember PARA itself is flexible. Even that friend of mine switched to Evernote and maintained PARA, though their recent free plan changes are unfortunate.
The key takeaway: PARA adapts to your workflow, not the other way around!